
Healsens App V1.*
Manual version: 1
Effective date: 21.05.2026
Intended use: personal health organization, education, and self-management of user-entered data.
ℹ️ For informational purposes only – NOT a diagnostic tool
Please read, understand, and follow all safety information contained in these instructions prior to using the Healsens App. Retain these instructions for future reference.
1. GENERAL INFORMATION
1.1 Intended Use
The Healsens App is a personal health organization and educational tool intended for adults (18 years and older).
The application enables users to:
– organize personal health checkups,
– browse publicly available information about biomarkers and general health topics,
– set reminders for laboratory tests or health-related activities,
– store laboratory results and self-reported wellbeing data.
⚠️ The application does not interpret laboratory results, provide risk assessments, generate diagnoses, or replace professional medical advice.
1.2 Important notes for use
⚠️ Please note: Healsens is a wellness app designed to help you track and better understand your data. It does not provide medical diagnoses, treatment, or medical advice.
If you have questions about your health, test results, or symptoms, we encourage you to speak with a qualified healthcare professional before making medical decisions.
⚠️ Healsens is not intended for emergencies or urgent health situations. If you are experiencing severe, persistent, or worsening symptoms, please seek medical attention promptly.
Symptom tracking in the app is designed to help you monitor patterns and changes over time. It does not determine causes, provide clinical evaluations, or replace professional care.
⚠️ Mood and energy tracking are intended to support self-awareness and reflection. The app does not diagnose or treat mental health conditions. Any suggestions provided are general wellness information and should not replace professional support when needed.
1.3. Privacy and Data Protection
Your data is securely stored and encrypted
⚠️ WARNING: Do not share your login details with third parties.
GDPR Compliance: The app complies with Articles 13–15 of GDPR, ensuring transparency, user rights, and data protection.
Data Storage: User data is stored for as long as the user actively uses the app. If there is no activity for 12 months, an email notification will be sent requesting confirmation to extend data storage. If the user does not confirm within 30 days, all data will be permanently deleted without the possibility of recovery. Users have full control over their data and can delete their account at any time by selecting the “Delete Account” option in the profile settings, which will immediately erase all associated data without the possibility of restoration.
Users have the right to access, delete, and export their data in accordance with Articles 13-15 of the GDPR.
Refer to the Privacy Policy before using the app.
2. DEVICE COMPATIBILITY & SYSTEM REQUIREMENTS
Compatible with:
- Android 6+ (API level 23 and above)
- iOS 12+
Potential Compatibility Issues:
- Older devices with outdated operating systems may experience performance issues.
- For best performance, use a smartphone manufactured within the last five years.
The useful life of the application is determined by the software update cycle, with a minimum support period of two years from the date of installation.
3. INSTRUCTIONS FOR USE
3.1 Installation and Setup
- Download and Install:
- The Healsens app can be downloaded from the Google Play Store or the Apple App Store.
- Ensure your device meets the system requirements.
2. Registration/Login:

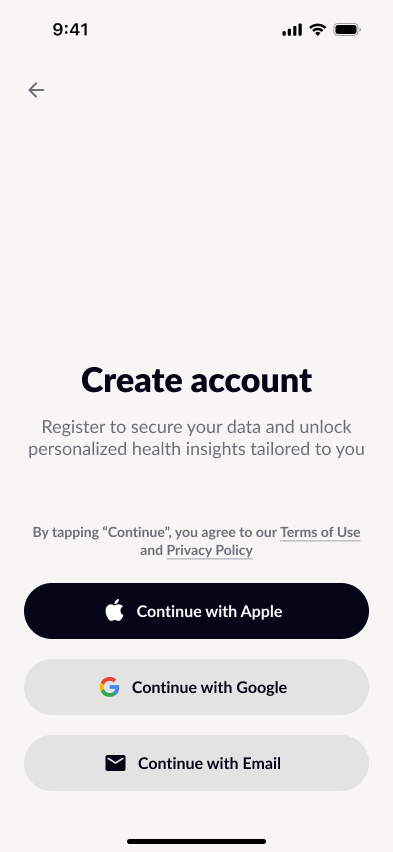
- If you are a new user, register tapping on Begin Your Wellness Journey or choose Sign in if you already have an account. (Fig. 1)
- If you are a new user, register using your email or social network account. (Fig. 2)
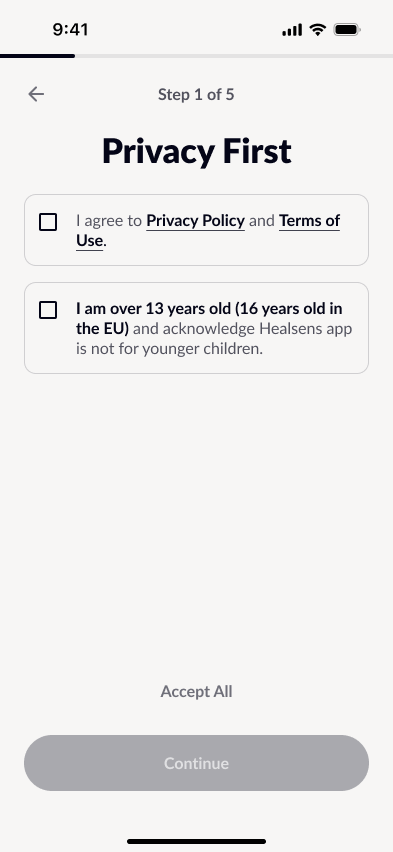
- If you are a new user, Accept Terms & Conditions and Privacy Policy before proceeding. (Fig. 3)
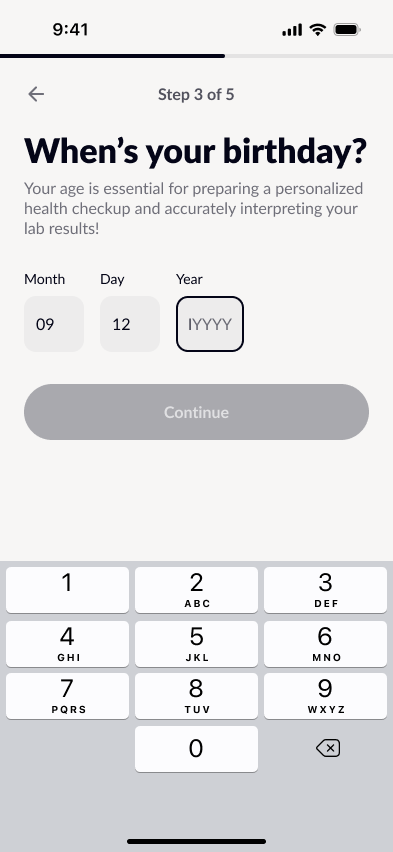
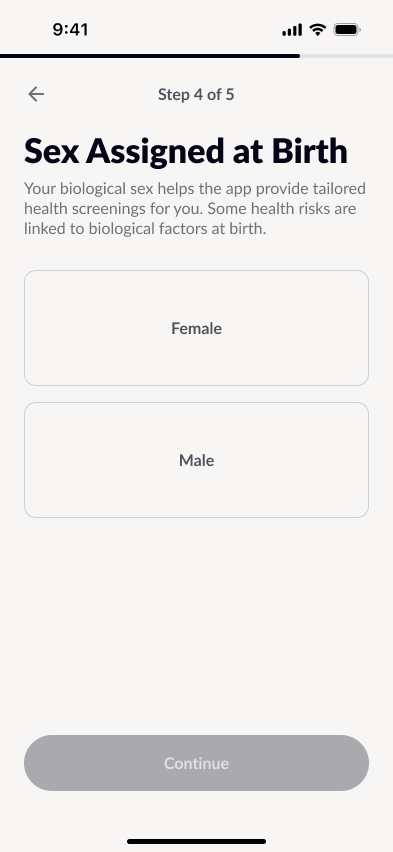
3. Profile Setup (Fig 4):
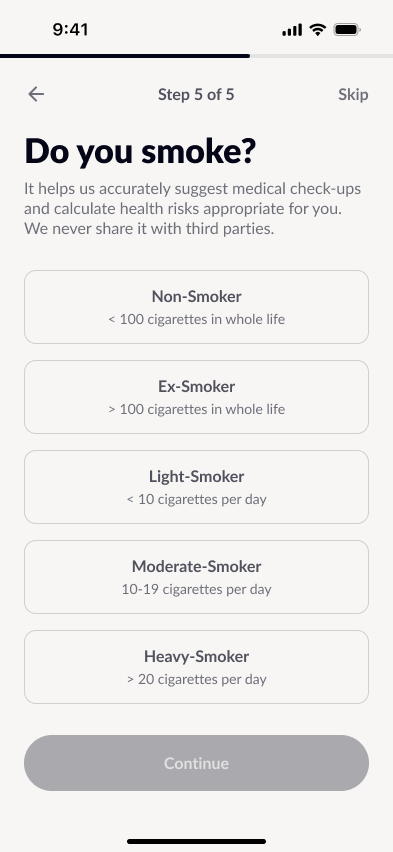
- Provide basic non-personal information (e.g., gender, age to adjust app features).(Fig. 4-5)
- Additionaly you can provide behavia pattern to setup your account or skip this steps (aclohol intake, smoking, etc). (Fig. 6)
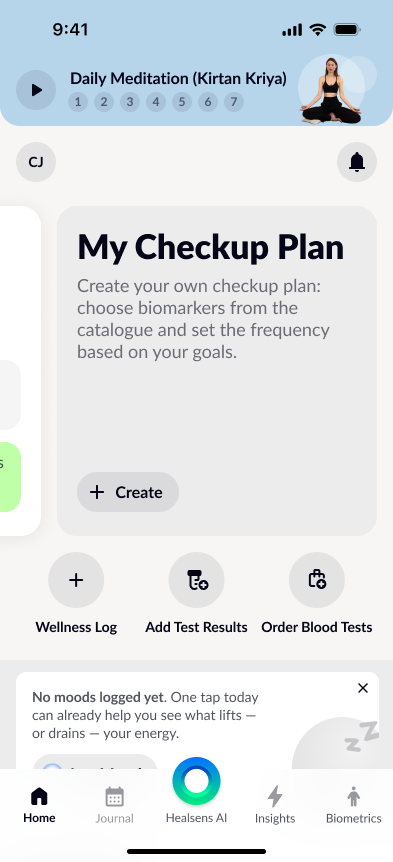
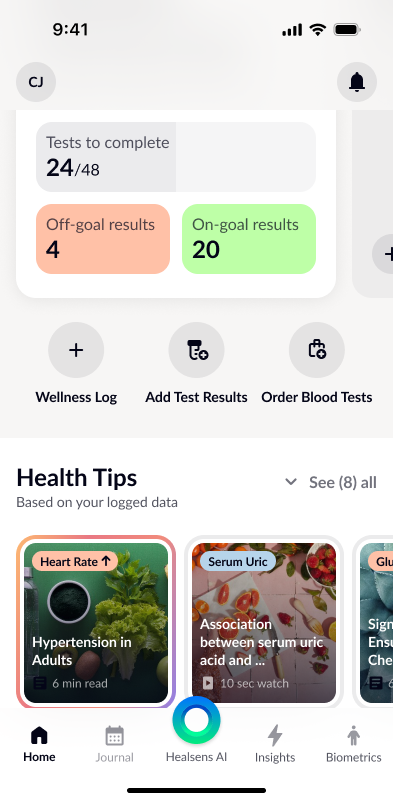
After profile setup or logging in to the Healsens app, and you can use it right away or to continue setup. On this main screen you can see Basic Health checkup Plan (Fig. 5), Create your Own Checkup Plan (Fig. 5), Everyday Meditation (at the top of the screen), Mood Screen, and the Application Menu (at the bottom of the screen).
3.2 Checkup plans
The Healsens App lets users create and manage checkup plans: add or remove items, set how often they want to review or update them, and track completion.
There are two options:
- Use the Healsens checkup template (Fig. 7)
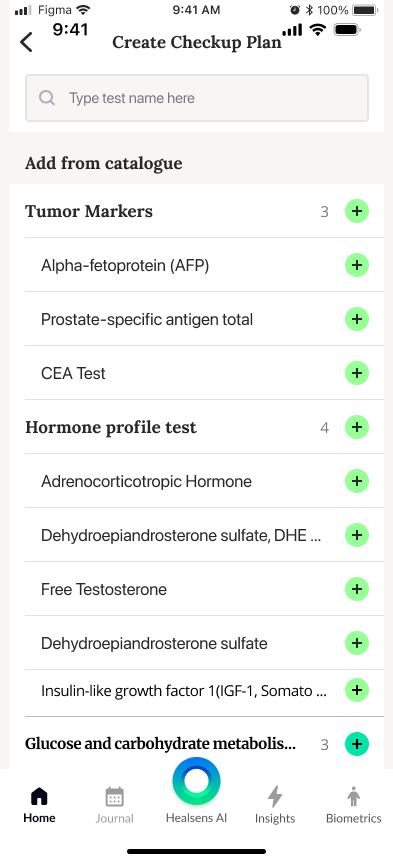
This template provides examples of commonly discussed checkup parameters for informational and organizational purposes only. Users can edit the template at any time: remove or add biomarkers and set the preferred frequency based on their personal goals. - Create a plan from scratch (Fig. 8–9)
To create your own checkup plan, tap Create and select biomarkers from the catalogue (Fig. 9). Then set your preferred frequency and save the plan.

⚠️ WARNING: The examples and templates are based on publicly available information and are intended to help users organize and track their own data. The app does not determine which tests are necessary, does not provide medical advice, and does not recommend or prescribe medical examinations. If you have questions about your health or your results, consult a qualified healthcare professional.
3.3 Entering and Saving Test Results
Healsens lets you add and save test results in two ways:
- Manual entry (from the in-app catalogue): select biomarkers from the catalogue and enter values yourself.
- Document-based entry (recognition): upload a document (for example, a lab report) and review the extracted values before saving.
Manual entry
To manually enter test results from the in-app catalogue:
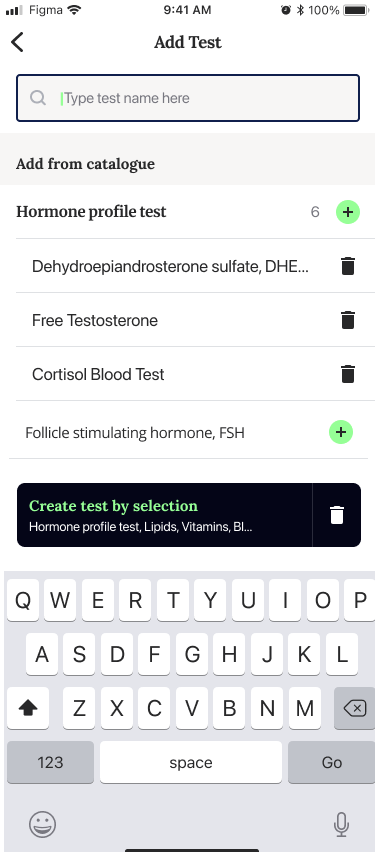
- On the main screen, tap Add Test Results. This opens the Add test results catalogue screen (Fig. 10).
- (Optional) Use the search field (Type test name here) to find a specific test.
- Tap the “+” icon next to each test you want to add. You can select multiple tests; your selections will appear in the bar at the bottom of the screen.
- When you’re ready, tap Create test by selection (bottom bar) (Fig. 11).
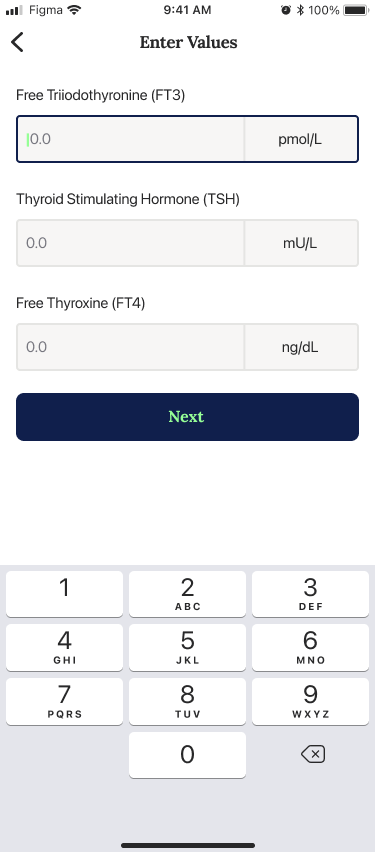
- On the Enter Values screen, enter the measured value for each selected test and confirm that the unit shown matches the unit on your report. Tap Next to continue (Fig. 12).
- On the Additional Data screen, confirm the Date (and Time, if applicable). You can also optionally add Place, Doctor, and Notes for your own record. Tap Save to finish.
Your results are saved and will be available in your journal.
Document recognition
To add test results by recognizing them from a document or photo:
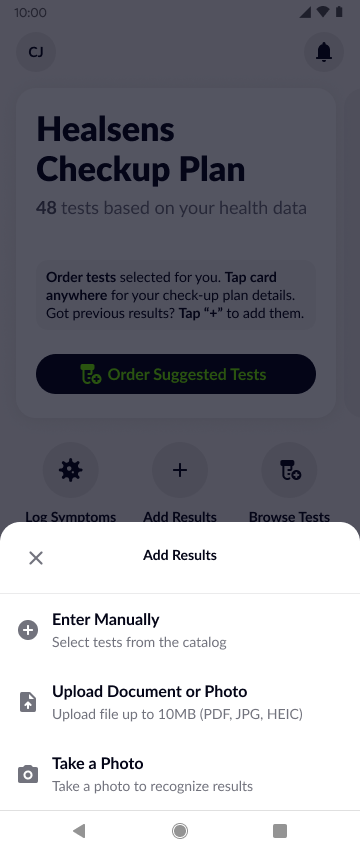
- On the main screen, tap Add Results.
- Choose Upload Document or Photo (to select an existing file) or Take a Photo (to capture your lab report using the camera).
- After you select or take a photo, Healsens uploads the file and shows a progress message (for example, Uploading…).
- Once the upload is complete, the app starts extracting values and shows a second progress message (for example, Recognizing…).
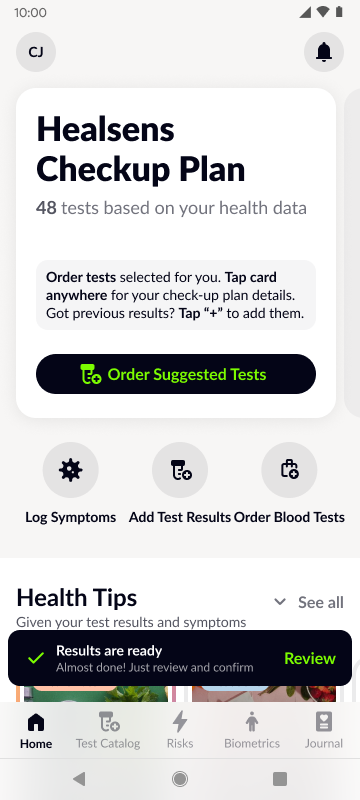
- When recognition finishes, you’ll see a confirmation that results are ready. Tap Review to check the extracted values before saving (Fig. 13).
If an issue occurs during upload or recognition, the app will show an error message (for example, Uploading Error or Recognizing Error). You can try again or use manual entry instead.
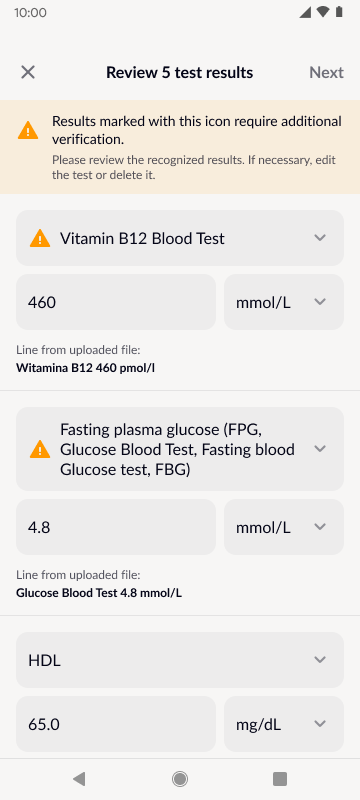
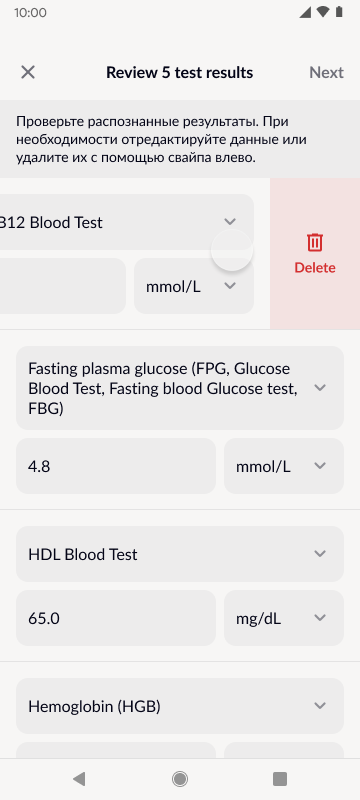
After processing, Healsens opens the Review test results screen:
- At the top, you’ll see the number of recognized items (for example, Review 5 test results) and a note that some items may require extra verification.
- Each row shows the recognized biomarker name, the extracted value, and the unit (Fig. 14). Compare each item with your original report and edit anything that looks incorrect.
- To change which biomarker a value is assigned to, tap the biomarker name to open Change biomarker, then search and select the correct item from the catalogue.
- To remove an item, tap the delete (trash) icon next to it (or, where available, swipe left to reveal Delete). If you delete the last remaining item, the app will ask for confirmation to prevent accidental removal.
When you’re satisfied with the list, tap Next to continue and complete the import.
3.4 Tips
Health Tips are short, curated pieces of educational content in the app. Some tips are general (for example, breathing or relaxation practices) and are shown to everyone. Other tips may be surfaced based on the information you’ve added in Healsens (for example, logged test results and other inputs), to help you explore topics that may be relevant to your tracking.
On the main Checkup Plan screen, you will find the Health Tips section showing a horizontal list of suggested tips (Fig. 16). Tap any visible tip card to open it directly(Fig. 17).
To browse the full library, tap See all in the Health Tips section. This opens the Health Tips view, where tips are grouped by topic (for example, Biomarkers, Glucose, Vitamins). From this screen, tap any tip card to open the full tip article.
The tip detail screen displays the title, estimated reading time, and the content itself. If you find the tip helpful, you can tap the Like (heart) icon to save your feedback.

3.4 Wellness Log
he Wellness Log allows users to record and track various wellness indicators such as symptoms, physical activity, water intake, mood, and other daily factors for monitoring purposes.
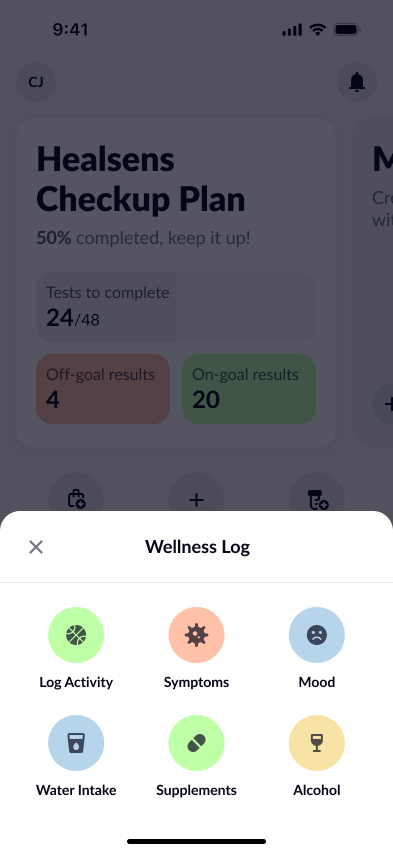
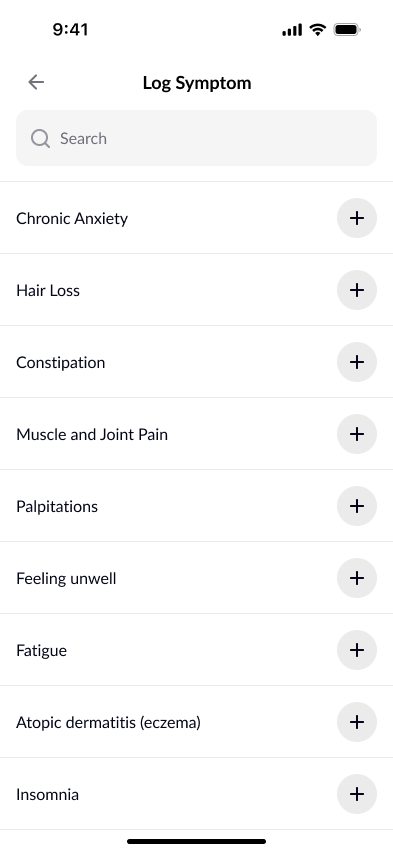
To add a new entry, tap Wellness Log on the main screen. A selection screen will open with available categories (Fig. 18). Choose the relevant category to proceed.
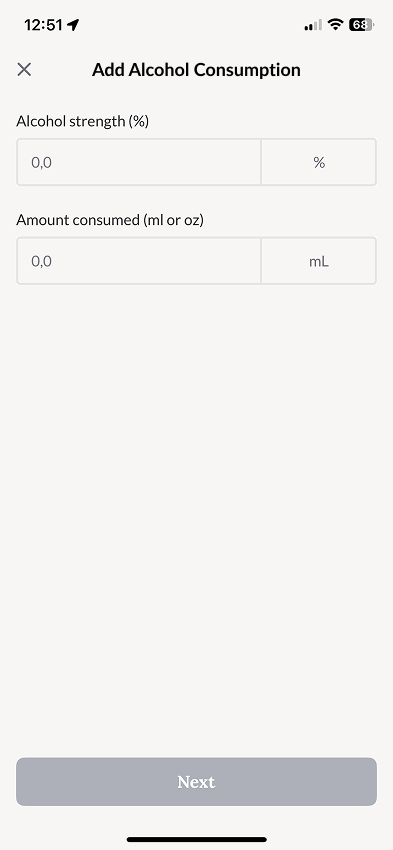
- For alcohol and water intake, you will be taken directly to the data entry screen (Fig. 19).
- For other categories, you will first see a selection list. You can scroll or use the search function to choose one or more relevant items (Fig. 20).
On the next screen, enter the necessary details and save your entry.
All saved entries appear in the Journal.
If you log a mood entry, the mood bar on the main screen will also update (see section 3.4.1 Mood Tracker for details).
3.4.1 Mood Tracker
The Mood Tracker allows users to record mood and energy levels over time and observe patterns and trends.
The Mood Tracker is displayed on the main screen of the app.
You can log your mood in two ways:
- Tap Log Mood on the Mood Tracker.
- Select a mood from the available options.
On the next screen, you will see a list of emotions (Fig. n+2). Review the list and select the emotions that best reflect how you feel at the moment. You may select multiple emotions.
Next, choose your current energy level and assign an intensity level to each selected emotion. Tap Next to continue.
On the final screen, you may add an optional comment or note about the situation before saving your entry.
After saving, the Mood Tracker may take a few seconds to update and display your summary.
By tapping “View Insight & Forecast”, you can see additional mood-related summaries within the app.
The Mood Tracker can be hidden from the main screen. To do so, go to Settings and disable the Mood Diary toggle.
Notes
⚠️ Note: If you find it difficult to choose emotions, you can use Healsens AI by tapping the button on the bottom panel and selecting the mood assistance option. The AI will guide you through a short series of neutral prompts (for example, about energy level, tension or relaxation, and general emotional tone) to help you reflect and select emotions that best describe your current state.
⚠️ Note: If you log symptoms before entering your mood, the Mood Tracker may include them in your summary for additional context. This can be helpful when reviewing how different daily factors relate to your mood entries.
3.5 Insights
Insights include calculated indices (for example, BMI, ratios, and composite wellness indicators) that are derived from user-provided laboratory and lifestyle data.
These values are informational wellness metrics designed to help you view your data in context and observe patterns over time. They are intended to support personal awareness and lifestyle reflection.
The application does not diagnose conditions, assess disease risk, provide clinical interpretation, or replace professional medical evaluation.
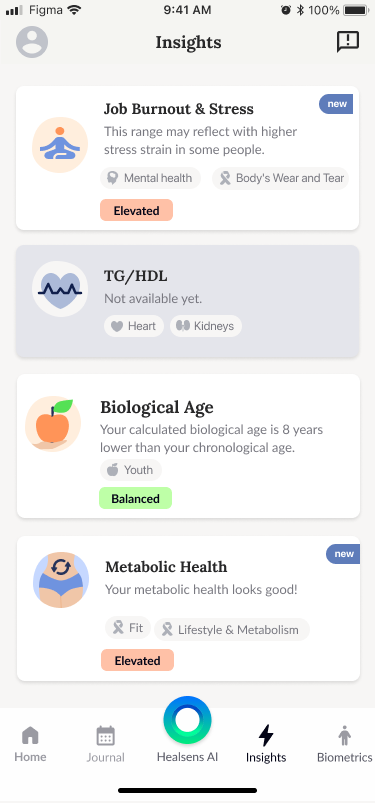
To access Insights, tap the corresponding button in the bottom menu. You will see all available calculators in the app (Fig. 21).
- If required data is missing, the calculator card will appear greyed out.
- When sufficient data is available, the card becomes active and color-coded.
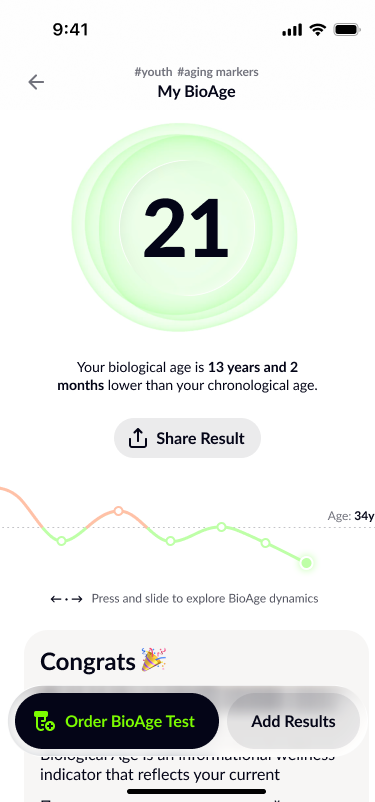
Tap a calculator card to open it (Fig. 22).
Inside each calculator, you will find:
- A short description
- A list of biomarkers required for the calculation
- A button to add results
- A button to order tests (if available in your region)
- A chart showing results over time
- A visualization of the most recent calculated value
You can add results directly from the calculator screen or via Entering and Saving Test Results (see Section 3).
The chart displays calculated values over time. Tap any data point to view the corresponding value and date of measurement.
Some calculators include a Discuss with Healsens AI option. This feature provides a breakdown of how different input values influence the overall calculated result. The AI highlights which inputs have a greater or lesser impact within the formula, based on the data you have entered.
Notes
⚠️ Note: If any input measurement changes, the calculator automatically recalculates the result and updates the chart accordingly.
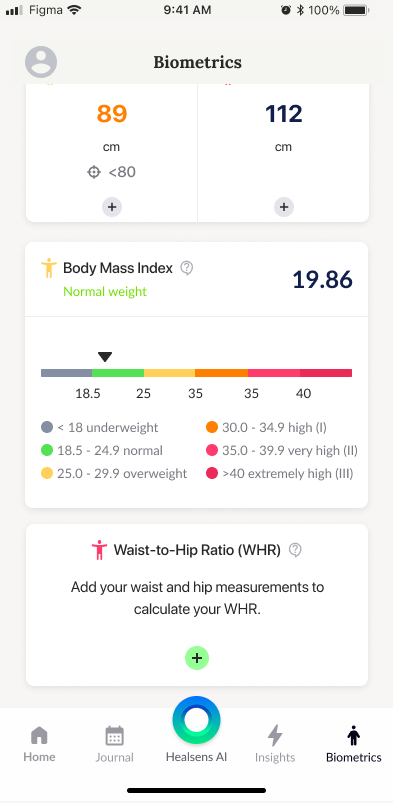
3.6 Biometrics
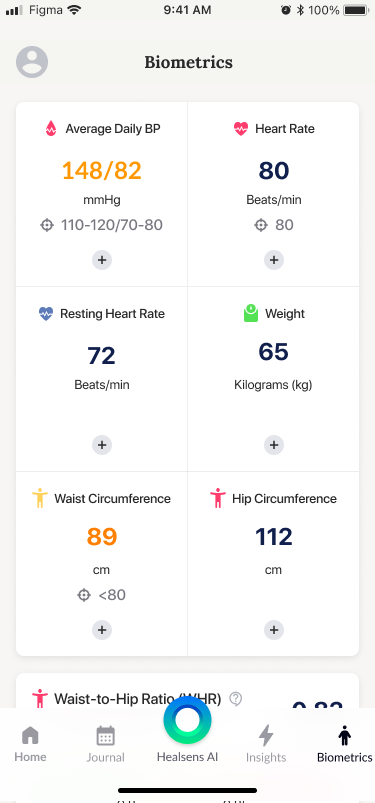
The Biometrics screen provides an overview of the measurements stored in your Healsens profile. Depending on which data you’ve added, this overview may include Heart Rate, Blood Pressure (BP), Resting Heart Rate, Weight, Waist Circumference, Hip Circumference, Body Mass Index (BMI), and Waist-to-Hip Ratio (WHR).
Each biometric card shows your most recent value (if available) and may include simple visual context, such as a range indicator or a BMI status label.
From this screen, you can add or update measurements at any time by tapping the “+” button on the relevant card, entering the value, and saving it to your profile.
Body Mass Index (BMI)
BMI is a simple calculation based on your height and weight. Healsens may display your BMI together with commonly used reference ranges for adults to help you place the number in context. BMI is an informational metric only and does not diagnose any condition. BMI has limitations and may not reflect body composition, pregnancy status, or other individual factors. If you have questions about your results, discuss them with a healthcare professional.
3.7 AI
Healsens AI is an in-app chat feature designed for educational and informational use only. To open it, tap the blue circular Healsens AI button on the main screen.
In the chat, you can start by choosing one of the suggested prompts or by typing your own message. Healsens AI can help you navigate and better understand the information you’ve added to the app—such as biomarker results, symptoms, and other logs—and can help you prepare for a conversation with a healthcare professional (for example, by helping you structure your thoughts and questions).
Healsens AI does not provide medical diagnoses, prescribe treatments, or replace professional medical advice. If something in your results feels unclear or worrying, consider discussing it with a qualified healthcare professional.
3.7 Shop
The Order Blood Tests feature lets you purchase available lab tests online directly from the app (where this service is offered).
To get started, open User Profile and tap Order Tests to open the test catalog. The catalog shows the tests currently available for purchase.
- Use the search field at the top to quickly find a specific test (optional).
- Tap the “+” icon to add a test to your basket. After adding, the icon changes to a checkmark to show it’s included.
When you’ve selected everything you need, go to the Shopping cart screen. There you’ll see:
- the selected items,
- the laboratory that will process the samples,
- and the total price.
Next, proceed to Checkout and enter the required details for order processing and delivery. Finally, continue to Payment to complete the purchase. Once payment is confirmed, your order is placed.

